
In the ever-evolving landscape of digital finance, Venmo has emerged as a go-to platform for seamlessly transferring money, splitting bills, and making payments with friends and businesses. Whether you’re settling your share of a restaurant bill, sending birthday gifts, or managing your finances, Venmo offers a user-friendly solution.
To harness the full potential of Venmo, the first step is to learn how to put money in venmo account. In this comprehensive guide, we’ll walk you through each stage of this process, from setting up your Venmo account to adding funds, withdrawing them, and utilizing your Venmo balance for transactions.
By the end of this article, you’ll have the knowledge and confidence to navigate Venmo’s features and manage your finances effortlessly. Let’s dive in!
1. Setting Up a Venmo Account:
Download and Install the Venmo App:
- The first step to putting money into Venmo is to download the Venmo app from your device’s app store. It’s available for both iOS and Android devices.
- Once downloaded, tap on the Venmo icon to open the app.
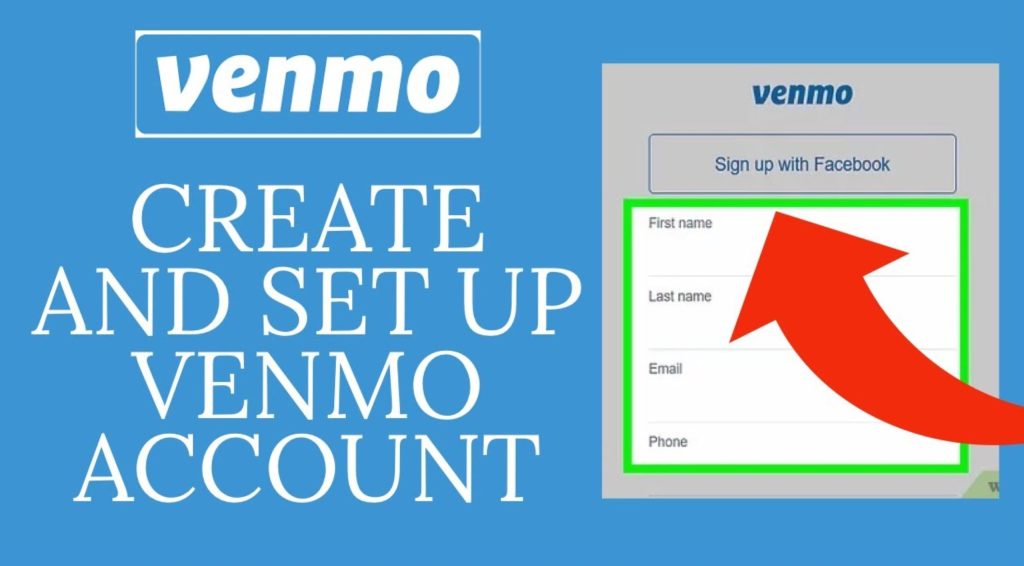
Sign Up for a Venmo Account:
- Upon opening the Venmo app, you’ll be greeted with the login screen. Since you’re setting up a new account, tap on the “Sign Up” or “Join Venmo” button.
Choose a Registration Method:
- Venmo offers two primary methods for registration: using your email address or your phone number. Choose the method you prefer.
Create a Password:
- After selecting your registration method, you’ll be prompted to create a password for your Venmo account. Make sure it’s strong and secure.
Complete Your Profile:
- Venmo will ask you to provide some personal information to set up your profile. This typically includes your full name, date of birth, and sometimes your profile picture.
- Accurate information is essential for account verification and security.
Verify Your Email or Phone Number:
- To ensure the security of your account, Venmo may require you to verify your email address or phone number. Follow the prompts to do so.
Link a Payment Method:
- To add funds to your Venmo account or use Venmo for payments, you need to link a payment method. This can be a debit card, credit card, or bank account.
- Venmo will guide you through the process of adding and verifying your chosen payment method.
Set Up Security Features:
- Venmo takes security seriously. Consider enabling two-factor authentication (2FA) for an extra layer of account protection.
- You may also want to set up a PIN or fingerprint recognition if your device supports it.
Review and Confirm:
- Before finalizing your Venmo account setup, review all the information you’ve provided to ensure accuracy.
- Once you’re confident that everything is correct, confirm your account setup.
Welcome to Venmo: – Congratulations! You’ve successfully set up your Venmo account. You can now use it to send and receive money, make payments, and add funds to your Venmo balance.
2. Linking a Payment Method:
Access Your Venmo Account:
- To begin the process of linking a payment method to your Venmo account, open the Venmo app on your mobile device.
- Ensure that you are logged in with your Venmo account credentials.
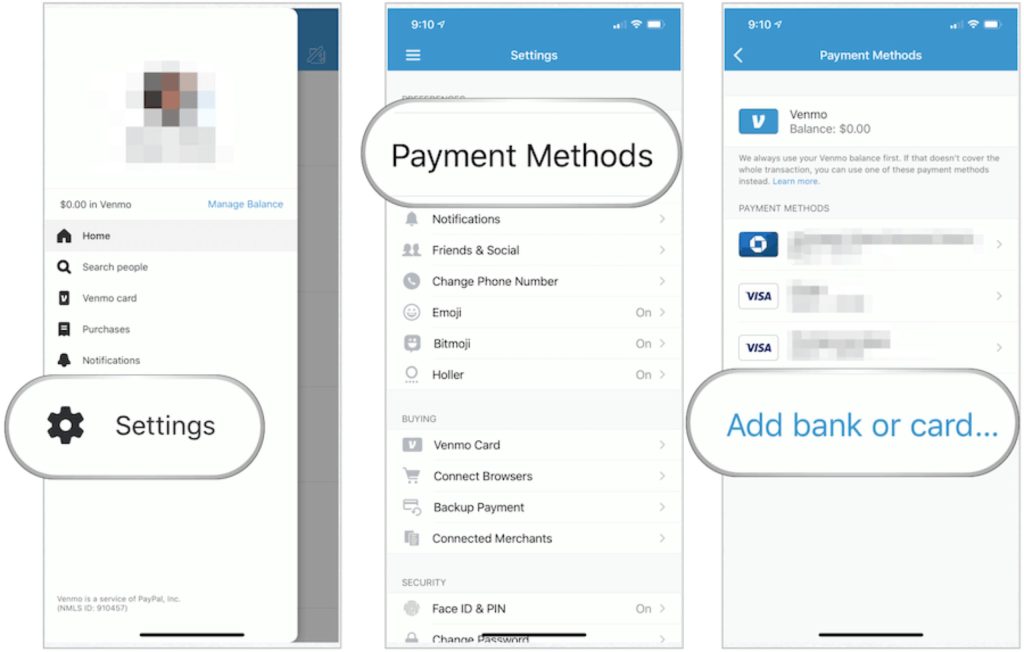
Navigate to Payment Methods:
- Once you are in the Venmo app, tap on the profile icon in the upper left corner. This will take you to your profile settings.
Access Payment Methods:
- In your profile settings, locate and tap on the “Payment Methods” or “Payment & bank” option. This is where you can manage your linked payment sources.
Add a Payment Method:
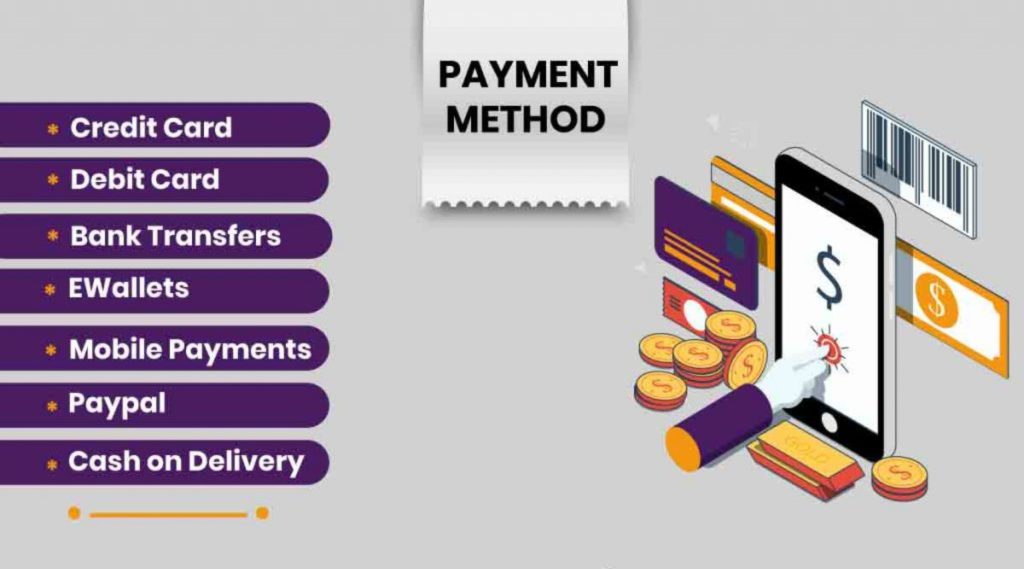
- On the Payment Methods screen, you will see options to add different types of payment methods, including credit or debit cards and bank accounts.
- Choose the type of payment method you want to link to your Venmo account.
Input Payment Information:
- Depending on your choice, you will need to provide the relevant payment information. Here’s what to expect for each option:
a. Credit or Debit Card:
If you select to add a credit or debit card, you’ll need to enter the card number, expiration date, security code, and billing zip code.
b. Bank Account:
If you choose to link your bank account, you will need to input your bank’s name, account holder’s name, account number, and routing number. Venmo will guide you on where to find this information on a check if needed.
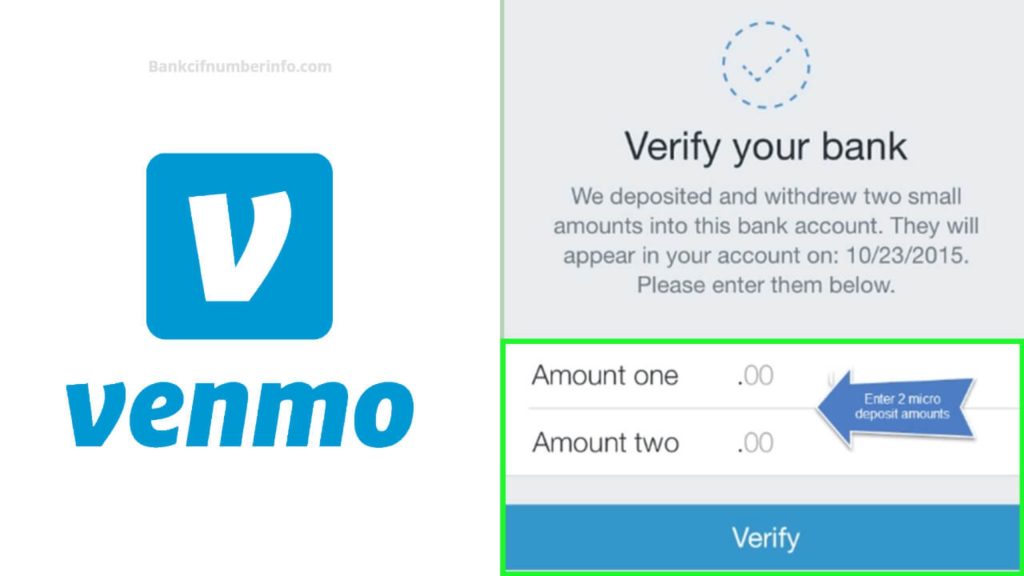
Verification Process:
- Venmo may require you to verify your payment method to ensure it’s valid and secure.
- The verification process often involves Venmo making small test deposits to your bank account or temporarily authorizing your credit/debit card with a nominal charge.
- Check your bank account or credit card statements for these verification transactions and enter the amounts or codes provided by Venmo to complete the verification.
Confirm and Save:
- After successful verification, confirm and save your linked payment method. This will make it available for use within your Venmo account.
Multiple Payment Methods:
- You have the option to link multiple payment methods to your Venmo account. This allows you to choose from different sources when adding funds or making payments.
Security Considerations:
- Ensure the security of your linked payment methods by regularly monitoring your Venmo account and transactions.
- Set up additional security features such as two-factor authentication (2FA) to further protect your account.
3. Verifying Your Identity:
Why Identity Verification is Necessary:
- Venmo takes security seriously to protect its users and prevent fraudulent activities. One of the security measures they implement is identity verification.
- Identity verification helps ensure that the person using the Venmo account is the legitimate account holder.
When Does Venmo Request Identity Verification:
- Venmo typically requests identity verification in certain situations, including:
- When you first create your Venmo account.
- When you link a new payment method.
- When you reach certain transaction or transfer limits.
- When Venmo’s automated systems flag a suspicious transaction.
The Identity Verification Process:
- When Venmo requests identity verification, they will guide you through a series of steps to complete the process. This usually involves providing personal information and documents.
Common Steps in Identity Verification:
- The specific steps may vary, but here are some common elements of the identity verification process:
a. Providing Personal Information:
You may need to enter or verify personal details such as your full name, date of birth, and address. Ensure this information matches the details you used to create your Venmo account.
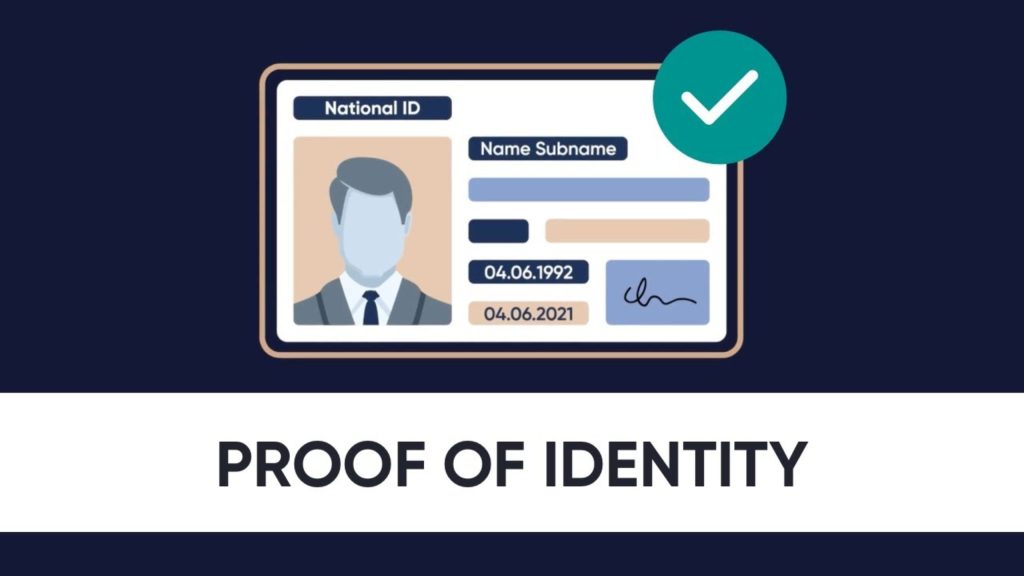
b. Document Upload:
Venmo may require you to upload documents for identity verification. Common documents include: – A photo of your government-issued ID, such as a driver’s license or passport. – Proof of address, like a utility bill or bank statement. – Selfie verification, where you take a picture of yourself holding your ID.
c. Confirmation and Review:
Venmo’s team will review the information and documents you provide. This may take some time, but you’ll receive updates on the status of your verification.
d. Completion:
Once your identity is verified, Venmo will confirm your account status, and you’ll be able to use your account without restrictions.
Tips for Smooth Identity Verification:
- Ensure the accuracy of the information you provide during identity verification.
- Use clear, well-lit photos when uploading documents and taking selfies.
- Be patient and allow Venmo’s verification team sufficient time to review your information.
Maintaining Security:
- Continue to monitor your Venmo account for any unusual activity even after identity verification. Keep your account secure by using strong passwords and enabling two-factor authentication (2FA).
4. Adding Funds to Your Venmo Account:
Introduction to Adding Funds:
- Once you’ve set up your Venmo account, the next step is to add funds to it. This allows you to make payments to friends or businesses conveniently. Here’s how to do it:
Access Your Venmo Account:
- To add funds to your Venmo account, open the Venmo app on your mobile device.
- Ensure that you are logged in with your Venmo account credentials.
Navigating to the “Add Money” Option:
- On the Venmo home screen, tap on the “☰” icon in the upper left corner or tap on the “Pay or Request” button.
Select “Add Money”:
- From the menu, choose the option “Add Money.” This will initiate the process of adding funds to your Venmo balance.
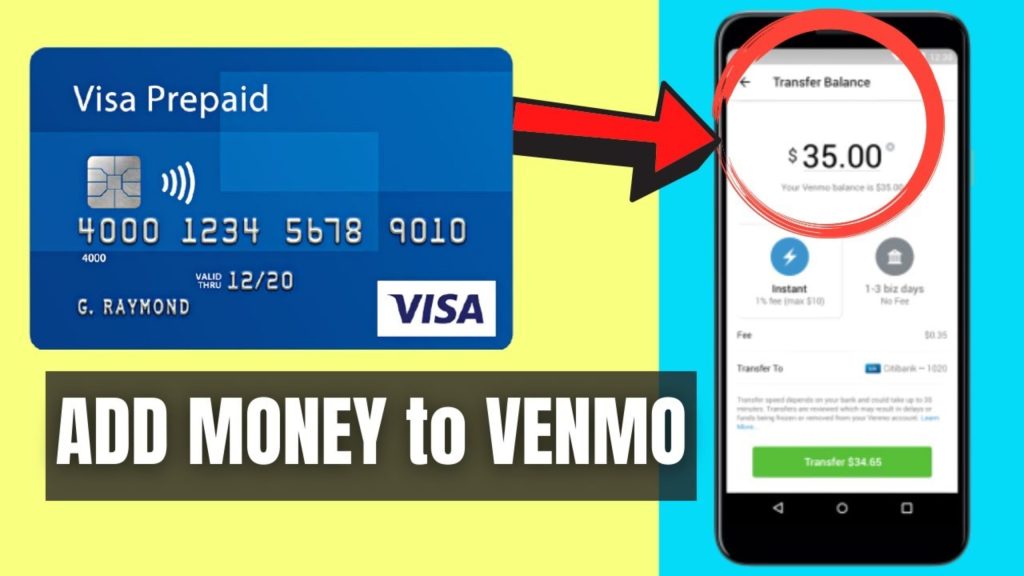
Enter the Desired Amount:
- You’ll be prompted to enter the amount of money you want to add to your Venmo account. Make sure it’s within your payment source’s available balance.
Choose a Payment Source:
- Venmo will then ask you to select the payment source you want to use for the transaction.
- You can choose from the payment methods you’ve linked to your Venmo account, such as a credit card, debit card, or linked bank account.
Review the Transaction Details:
- Carefully review the transaction summary, including the amount to be added and the payment source you’ve selected.
Confirm the Transaction:
- Once you’re satisfied with the details, tap the “Add” or “Confirm” button to proceed with the transaction.
Transaction Confirmation:
- Venmo will display a confirmation message once the funds have been successfully added to your Venmo balance.
- You can now use these funds to make payments to friends, pay for purchases, or send money to others.
Monitoring Your Venmo Balance: – After adding funds, it’s a good practice to check your Venmo balance regularly to keep track of your available funds.
Withdrawing Funds from Venmo:
If you ever want to transfer the money from your Venmo balance back to your bank account, you can do so by tapping the “Transfer to Bank” option in the Venmo app.
5. Entering the Amount:
Once you’ve accessed the “Add Money” option in your Venmo app, the next step in the process is entering the amount you want to add to your Venmo account. This step is crucial as it determines the funds you’ll have available for making payments and transactions within the app. Here’s how to do it:
Precision Matters:
- Take a moment to carefully consider the amount you want to add to your Venmo balance. Make sure it’s an accurate reflection of your intended transaction or financial needs.
Account for Transaction Limits:
- Keep in mind that Venmo may have transaction limits for adding funds, especially for newer accounts. These limits are in place to enhance security and may increase as you use the app more frequently.
Available Funds:
- Ensure that the amount you enter is within the available balance of the payment source you’ve selected. If you attempt to add more than what’s available, the transaction may be declined.
Currency and Decimals:
- Venmo supports transactions in U.S. dollars (USD). If you are adding money in a different currency, it will be converted to USD based on the prevailing exchange rate.
- Use the appropriate decimal point for cents (e.g., for $25.50, enter “25.50” rather than “2550”).
Rounding Up or Down:
- Depending on your preference, you can round up or down the amount you’re adding. If you’re splitting a bill with friends, for instance, you can enter the exact amount you owe.
Double-Check Your Entry:
- Before proceeding to the next step, double-check the amount you’ve entered to ensure it’s accurate. Errors in the amount may lead to complications in your transactions.
Remember Your Budget:
- When using Venmo, it’s a good practice to budget and manage your finances responsibly. Only add the amount you need for your intended transactions to avoid overspending.
6. Choose a Payment Source:
Once you’ve entered the desired amount to add to your Venmo account, the next step is to choose a payment source. Venmo allows you to link various payment methods, such as credit cards, debit cards, and bank accounts, to fund your Venmo balance. Here’s how to select the right payment source:
Understanding Payment Sources:
- Venmo provides flexibility by allowing you to choose from various payment sources, including:
- Credit Card:
If you select a credit card, you’ll be using your card’s available credit to fund your Venmo account. This can be convenient for making immediate payments. - Debit Card:
Debit cards draw funds directly from your bank account, providing real-time access to your available balance. - Bank Account:
Linking your bank account enables you to transfer money from your bank to your Venmo account. This option is useful for larger transactions or maintaining a Venmo balance.
- Credit Card:
Consider Transaction Speed:
- Depending on your payment source, transaction speed can vary:
- Credit Card:
Transactions using a credit card are usually processed quickly, and the funds become available in your Venmo balance almost immediately. - Debit Card:
Debit card transactions are also fast, as they draw from your linked bank account. - Bank Account:
Transfers from a bank account may take a bit longer, typically 1-3 business days, before the funds are available in your Venmo account.
- Credit Card:
Payment Source Limits:
- Be aware that your payment source may have its own limits on transactions or withdrawals. Ensure the amount you intend to add aligns with the limits set by your chosen payment method.
Default Payment Source:
- Venmo allows you to set a default payment source. The default source is the one Venmo will use for transactions by default unless you specify otherwise.
Selecting the Right Source:
- When choosing a payment source, consider your immediate financial needs, transaction speed, and any potential fees associated with your choice. For example, credit card transactions may incur cash advance fees.
Security and Verification:
- Ensure that your selected payment source is verified and up-to-date. Venmo may require you to verify your payment method for added security.
Multiple Payment Sources:
- Venmo allows you to link multiple payment sources to your account. This flexibility is valuable if you want to choose different sources for different transactions.
7. Confirm the Transaction:
Once you’ve entered the desired amount and chosen your payment source to add funds to your Venmo account, the next crucial step is confirming the transaction. This step ensures that your funds are successfully transferred to your Venmo balance. Here’s how to confirm the transaction:
Review the Transaction Details:
- Before proceeding, take a moment to carefully review the transaction details presented on your screen. This includes:
- The amount you are adding to your Venmo balance.
- The payment source you’ve selected (e.g., credit card, debit card, or bank account).
Verify Accuracy:
- Make sure the information displayed is accurate and aligns with your intentions. This is your opportunity to catch any errors or discrepancies before finalizing the transaction.
Double-Check Payment Source:
- Ensure that the payment source you’ve selected has sufficient funds or credit to cover the transaction. If not, you may need to choose a different payment source or adjust the transaction amount.
Confirm the Transaction:
- Once you’re satisfied with the transaction details, tap the “Add” or “Confirm” button to initiate the transfer of funds to your Venmo balance.
Transaction Confirmation:
- After confirming the transaction, Venmo will provide you with a confirmation message indicating that the funds have been successfully added to your Venmo account.
Check Your Venmo Balance:
- To verify that the transaction was processed correctly, check your Venmo balance. It should now reflect the added funds.
Transaction Processing Time:
- The processing time for the transaction may vary depending on the payment source you’ve chosen. Credit and debit card transactions typically result in immediate fund availability, while bank transfers may take 1-3 business days.
Monitoring Your Transactions:
- After confirming the transaction, it’s a good practice to monitor your Venmo account for any updates or notifications regarding the transaction. Venmo may also send you email confirmations for added security.
Transaction History:
- You can view a detailed transaction history within the Venmo app, allowing you to track your financial activities and keep records of your transactions.
8. Transaction Confirmation:
After you’ve entered the desired amount, selected a payment source, and confirmed your transaction details, the final step is receiving a transaction confirmation. This confirmation assures you that the funds have been successfully added to your Venmo balance. Here’s what you need to know about transaction confirmation:
Immediate Confirmation:
- In most cases, once you tap the “Add” or “Confirm” button to initiate the transaction, Venmo provides immediate confirmation on your screen.
Confirmation Message:
- The confirmation message typically includes details such as the amount added, the payment source used, and a timestamp of the transaction.
Transaction ID:
- Venmo usually assigns a unique transaction ID to each transaction. This ID can be helpful if you need to reference or track the transaction later.
Email Confirmation:
- Additionally, Venmo may send you an email confirmation of the transaction for your records. Check your email inbox for this confirmation.
Check Your Venmo Balance:
- To ensure the transaction was processed correctly, check your Venmo balance within the app. It should now reflect the added funds.
Pending Transactions:
- Keep in mind that for bank transfers, the funds may not be immediately available in your Venmo balance. They could appear as pending until the transfer is completed, which typically takes 1-3 business days.
Transaction History:
- You can access your transaction history within the Venmo app. This feature allows you to keep a record of all your financial activities, including the recently completed transaction.
Monitoring for Errors:
- While transaction confirmations are usually accurate, it’s a good practice to monitor your Venmo account for any discrepancies or errors. If you notice any issues, contact Venmo’s customer support promptly.
Receipt for Payments:
- If you’re making payments to friends or businesses, keep in mind that Venmo also provides the option to request or send receipts for these transactions, adding an extra layer of transparency.
9. Using Your Venmo Balance:
Once you’ve successfully added funds to your Venmo account, you’re ready to make payments, send money to friends, and conduct various financial transactions using your Venmo balance. Here’s a comprehensive guide on how to make the most of your Venmo funds:
Making Payments to Friends:
Venmo is known for its convenience in splitting bills and making payments to friends. To make a payment:
- Open the Venmo app and tap on the “Pay or Request” button.
- Enter your friend’s Venmo username, email, or phone number.
- Specify the payment amount and add a brief description.
- Choose your Venmo balance as the payment source.
- Tap “Pay” to complete the transaction.
Paying Businesses:
Many businesses now accept Venmo as a payment method. To pay a business:
- When checking out at a Venmo-accepting business, select Venmo as your payment option.
- Confirm the payment amount and tap “Pay with Venmo.”
- Log in to your Venmo account if prompted.
- Review the transaction details and confirm the payment.
Sending Money to Bank Accounts:
If you wish to transfer your Venmo balance back to your bank account:
- Tap the “☰” icon in the upper left corner.
- Select “Transfer to Bank” and follow the prompts.
- Choose the amount you want to transfer and the linked bank account.
- Confirm the transaction, and the funds will be transferred to your bank account within 1-3 business days.
Requesting Payments:
You can also use your Venmo balance to request payments from friends or anyone who owes you money:
- Tap the “Request” button within the Venmo app.
- Enter the contact information of the person you want to request money from.
- Specify the amount owed and add a description.
- Send the payment request.
Splitting Bills:
Venmo makes it easy to split bills with friends when you’re out for dinner, going on a trip, or sharing expenses. To split a bill:
- Create a payment using your Venmo balance to cover your portion of the bill.
- Ask your friends to reimburse you by sending their share to your Venmo account.
Monitoring Your Venmo Balance:
To keep track of your Venmo balance and recent transactions:
- Tap the “☰” icon in the upper left corner.
- Select “Settings” and then “Balance.”
- Here, you can view your balance, transaction history, and add or withdraw funds.
Security and Privacy Considerations:
While using your Venmo balance, it’s essential to:
- Keep your Venmo account secure with strong passwords and enable two-factor authentication (2FA) for added protection.
- Be cautious when making payments to unfamiliar contacts or businesses.
- Check your transaction history regularly to ensure accuracy and report any unauthorized transactions promptly.

10. Withdrawing Funds from Venmo:
While your Venmo balance is convenient for making payments and sending money, you may also want to withdraw funds from Venmo and transfer them back to your linked bank account. This allows you to access your money when needed. Here’s how to withdraw funds from Venmo:
Access the Venmo App:
To initiate a withdrawal, open the Venmo app on your mobile device and ensure that you’re logged in with your Venmo account credentials.
Navigate to “Transfer to Bank”:
- Tap the “☰” icon located in the upper left corner of the app to access the menu.
- Scroll down and select “Transfer to Bank” from the options provided.
Choose the Withdrawal Amount:
- You’ll be prompted to enter the amount of money you wish to withdraw from your Venmo balance. Ensure that the amount falls within your available balance.
Select the Linked Bank Account:
- Choose the linked bank account to which you want to transfer the funds. Ensure that this account is up-to-date and verified.
Review the Transaction Details:
- Carefully review the transaction details, including the withdrawal amount and the selected bank account.
Confirm the Withdrawal:
- Once you’re satisfied with the transaction details, tap the “Transfer” or “Confirm” button to initiate the withdrawal.
Transaction Confirmation:
- Venmo will provide you with a confirmation message to indicate that the withdrawal has been initiated. This confirmation may also include an estimated timeframe for when the funds will be available in your bank account.
Transaction Processing Time:
- The time it takes for the withdrawal to be completed can vary based on several factors, including your bank’s processing times. In general, bank transfers from Venmo typically take 1-3 business days to complete.
Checking Your Bank Account:
- To ensure the withdrawal was successful, check your linked bank account after the expected processing time. The withdrawn funds should now be available in your bank account balance.
Multiple Withdrawals:
- You can initiate multiple withdrawals from your Venmo balance as needed, provided that your available balance can cover each withdrawal.
Security Considerations:
- To keep your financial transactions secure:
- Always use strong, unique passwords for both your Venmo account and linked bank account.
- Monitor your Venmo transactions for accuracy and report any unauthorized activity promptly.
Frequently Ask Questions
- Which laptop has the highest quality?
- Laptops from premium brands like Apple (MacBooks), Dell (XPS series), HP (Spectre series), and Lenovo (ThinkPad series) are often considered to have high build quality and overall excellence.
- What is a good laptop for realtors?
- A good laptop for realtors would typically be a lightweight and portable device with a reliable processor, sufficient RAM (8GB or more), and a good display. Some options include the Dell XPS 13, MacBook Air, or the Microsoft Surface Laptop.
- What laptop is Elon Musk using?
- Elon Musk has been seen using Apple MacBook laptops in the past, but his choice of laptop may vary over time.
- Which laptop is fastest?
- Laptops with high-end processors, ample RAM, and solid-state drives (SSDs) tend to be the fastest. High-performance laptops from companies like Alienware, ASUS ROG, and MSI are known for their speed.
- Which laptops are best nowadays?
- Some of the best laptops currently include the Apple MacBook Air and MacBook Pro, Dell XPS series, HP Spectre series, Lenovo ThinkPad series, and the Microsoft Surface lineup.
- Which laptop has the highest graphics?
- Laptops designed for gaming or professional graphics work, like those from ASUS, MSI, Razer, or Alienware, often have the highest-quality graphics cards.
- Which laptop is used by Bill Gates?
- Bill Gates has been known to use various laptops and devices over the years, including Microsoft Surface products and other Windows-based laptops.
- Which laptop do CEOs use?
- CEOs often use high-end laptops from premium brands such as Apple, Dell, HP, or Lenovo, depending on their personal preferences and needs.
- Which laptop is used at Google?
- Google employees typically use a variety of laptops, including those running Chrome OS and Windows. Google has its own line of Chromebooks known as Pixelbook.
- Do realtors use Mac or Windows?
- Realtors use both Mac and Windows laptops depending on their personal preferences. Both platforms offer software and tools that are useful in the real estate industry.
- What’s the best computer for a real estate agent?
- The best computer for a real estate agent would be a laptop that is portable, has a good battery life, and runs real estate software efficiently. Options include the MacBook Air, Dell XPS 13, or the Microsoft Surface Laptop.
- What laptop do most architects use?
- Architects often use laptops with powerful processors and dedicated graphics for design and modeling. Some popular choices include the Dell Precision series, HP ZBook series, and Lenovo ThinkPad P series.
- Which are the top 5 laptops?
- The top 5 laptops can vary depending on your needs, but as of my last knowledge update in September 2021, some highly regarded laptops included the MacBook Air, Dell XPS 13, HP Spectre x360, Lenovo ThinkPad X1 Carbon, and the ASUS ROG Zephyrus G14 for gaming.
- Which company laptop is best in Pakistan?
- In Pakistan, you can find laptops from various brands, and the “best” brand may depend on your specific requirements. Some popular brands in Pakistan include Dell, HP, Lenovo, and Acer.
- What laptop do professionals use?
- Professionals often use laptops from reputable brands known for their reliability and performance. Options include Apple MacBook Pro, Dell XPS series, HP Spectre series, and Lenovo ThinkPad series.
- Which brand is king of laptop?
- There’s no definitive “king” of laptops, as the best brand depends on individual preferences and needs. Apple, Dell, HP, Lenovo, and ASUS are among the top laptop manufacturers.
- Does Elon use Mac or PC?
- Elon Musk has used both Mac and PC laptops in the past. His choice may vary depending on his current preferences.
- Which laptop brand is best for professionals?
- Laptop brands like Apple, Dell, HP, and Lenovo are popular choices among professionals due to their reliability, performance, and support.
- Is Dell better than HP?
- The choice between Dell and HP depends on personal preferences and specific needs. Both brands offer high-quality laptops, so it’s essential to consider the model and features that match your requirements.
- Which is the No 1 laptop?
- There is no single “No 1” laptop as it depends on your usage requirements. However, laptops like the MacBook Air, Dell XPS 13, and Lenovo ThinkPad X1 Carbon are often highly rated.
- How much RAM do I need in a laptop?
- The amount of RAM you need in a laptop depends on your usage. For general tasks like web browsing and office work, 8GB of RAM is sufficient. For more demanding tasks like video editing or gaming, 16GB or more may be better.